
We love traditionally fermented sauerkraut! I have been making it for nearly 20 years. My husband laughs cause I get so excited when I see cabbages available at the local farmers market because it means I can get a bunch and make sauerkraut and all the variations we love.
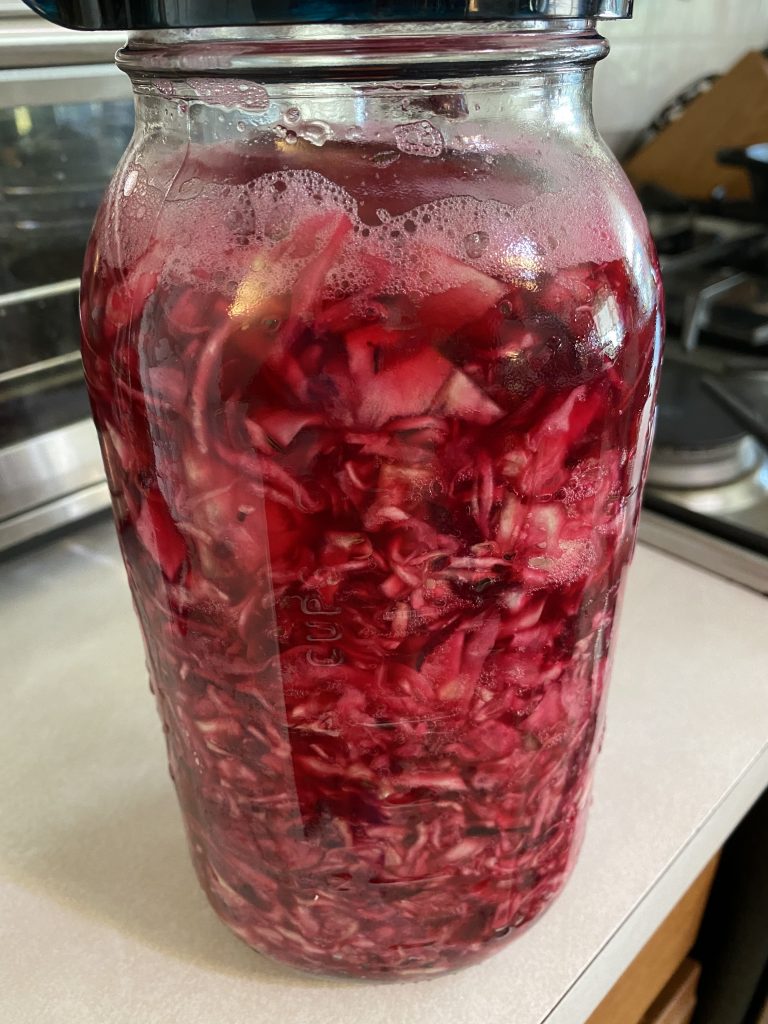
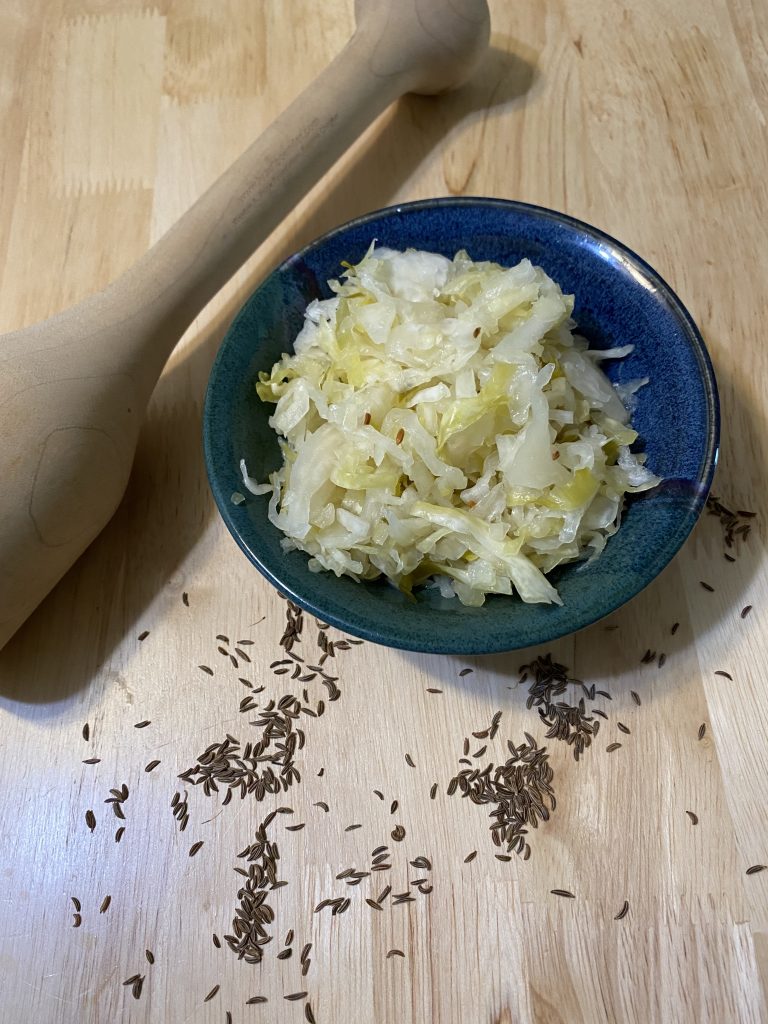
I typically make my sauerkraut in stoneware fermenting crocks. You can definitely ferment in jars and it won’t take as long to ferment, as the volume is much less. We make a large batch (sometimes two) of just regular sauerkraut with caraway seeds. I also like to make a few jars of various other versions of sauerkraut. I currently have a 1/2 gallon jar of cabbage and shredded beets with caraway seeds going, it is a funky purple/red color that I think will make wonderfully sweet and sour kraut. Another delicious kraut is one made with cabbage mixed with thinly sliced apples and caraway seeds. There are so many variations for making fermented sauerkrauts that you could never run out of ideas.
Health Benefits
Fermented vegetables (and ferments in general) are some of the things we try to incorporate into our diet frequently. They are so healthy. Fermentation produces wonderful bacteria that are great for gut health. Packed with probiotics they can really boost your immune system which is greatly affected by your gut microbiome. The process of fermentation also increases the vitamin content over the vegetables in their raw state. The vitamins and minerals become much more bioavailable to your body, as well. Fermentation can also break down anti-nutrients in vegetables (or other items you ferment).
I like to eat ferments as a side or condiment with my meals. Small quantities, frequently. CAUTION: If you aren’t used to eating fermented foods or drinks, make sure you start slow. Eat just a bite or two the first time. Slowly increase the amounts you consume at a time. Too much of the good bacteria flooding your system at one time can cause a die-off/detox effect and you may feel sick. You don’t want to eat too many at once and find your body isn’t ready for it.
Safety
I get a lot of questions on how safe it is to ferment. What about botulism? What about doing it wrong and making people sick? There are of course things that can go wrong in fermentation. I have had to throw out ferments…it makes you cry sad tears. However, overall fermentation is a very safe method of food preservation.
The process of lactic acid fermentation and the lactic acid that is produced makes an environment in which the good bacteria can proliferate. This environment is one the bad bacterias don’t like. It is highly unlikely for botulism to happen because the acidic environment that fermentation produces is antagonistic to the Clostridium botulinum bacteria. So as long as you have a properly fermented item, the risk of botulism is low.
Mold and Kahm Yeast
Fermentation is an anaerobic environment. What I have had go wrong with my ferments is that air got in and allowed mold to grow. You will know if your ferment developed mold and it will smell extremely unpleasant. It is important to make sure you have the right salinity. It is also important to keep the majority of the vegetable material below the brine.
Having all the material below the brine prevents oxygen from getting in to cause mold. If you find a bit of mold on the top of the brine above the weights, you can just skim it off. The rest of the ferment should be fine, you can really smell a bad cheesy or off smell if it has gone bad. If there is mold under the weights in the main amount of the material, I throw it out. Mold has spores that can travel down like tendrils and the entire batch would contain the spores.
The other main issue that can happen with ferments is Kahm Yeast. Kahm yeast is harmless in terms of eating the ferment, but you want to remove it since it can have a funky flavor. Kahm yeast will not be fuzzy like mold. It will be more like a stringy texture and white to off-white/cream-colored. Mold can be many different colors. I find using the fermentation lids or an airlock cut down on the chances of both mold and kahm yeast by keeping oxygen out. This site has a nice photo of kahm yeast.
Equipment
The type of crock I use for my sauerkraut is a Harsch Crock. It has two weights that fit in over the top of the vegetables to weigh them down into the brine, the lid also forms a recessed chamber that you fill with water and it keeps the air out, but lets the carbon dioxide escape. It is very similar to this crock.
If I don’t use my crock and I ferment in a mason jar, I use these fermentation lids and weights. I like these as they keep the air out and allow the carbon dioxide to escape so I don’t have to constantly burp my ferments. The weights and lids fit a wide-mouth mason jar. My lid set came with a pump to remove any air out of the jar after you put the lid on. These lids have kept my ferments mold-free and no kahm yeast, so far.
A canning funnel is something I consider essential to fill my jars. I find it helps to lessen the mess of filling the jars. The funnel fits both wide and narrow mouth jars. This particular funnel has headspace markings on it, which I find really convenient when filling jars.
One tool that is very helpful and that I use every time I make any kraut is a kraut pounder. I like to use that tool to help macerate the cabbage with the salt when I put it in the crock. It really helps to get the juices out of the cabbage and soften it. It is also useful for pushing the cabbage/vegetables into the jars if I am fermenting in a mason jar.
Making Sauerkraut in a crock
I make my sauerkraut by shredding my cabbage. It is shredded by using a food processor with a slicing blade. It is perfectly fine to do it with a knife or mandoline. We prefer some finer shreds mixed with bigger pieces which is what I find I get with the slicing blade.
After the cabbage is cut/shredded, layer some cabbage in the crock and sprinkle a bit of sea salt and mix it up. Next, use the kraut pounder to pound it until it softens and some liquid comes out of the cabbage. Then add another layer and repeat. Repeat this process until all the cabbage is done and there is a good amount of liquid brine that came out of the cabbage.
I would say for about 5 pounds of cabbage I use 3-4 Tablespoons of fine sea salt. It should taste very salty like seawater, or a little bit saltier than that. If you find your cabbage isn’t producing enough brine to cover it when you weigh it down, you can add some salt brine. I find if I leave the cabbage mixture for a bit of time, it will continue to release water and I can continue with the process.
After the cabbage is soft and there is enough liquid in the crock, I place my clean weights over the cabbage. If you want you can put a washed large outside leaf from the cabbage over the main material before you put the weights in the crock. I try to make sure all the cabbage is under the weight, especially around the upper sides of the crock. The salt brine should come over the top of the weights.
If you need to add brine to cover the weights, use 1 Tablespoon of salt to 1 cup of water (I use filtered water). Once the weights and cabbage are covered with brine, put the lid on the crock and fill it with water. We keep our ferments in our basement where it is dark and cool. I generally let a 10L crock ferment for 8 weeks in my cool basement. Ferment time will vary depending on temperature, humidity, etc. I usually taste it and if it is still too salty, I let it ferment longer.
Once my sauerkraut is how I like it, I put it in jars and store it in the refrigerator. The refrigerator will greatly slow down the fermentation. I like my sauerkraut crunchy. It will stay that way in the fridge for many months. It is still good to eat for a long time but may become less crunchy and a bit darker in color the longer it ferments.
When I make it in jars, I usually check it after about four weeks, and each week after till it is the taste and texture I want. It won’t take as long to ferment in the jars.
Making sauerkraut in a jar
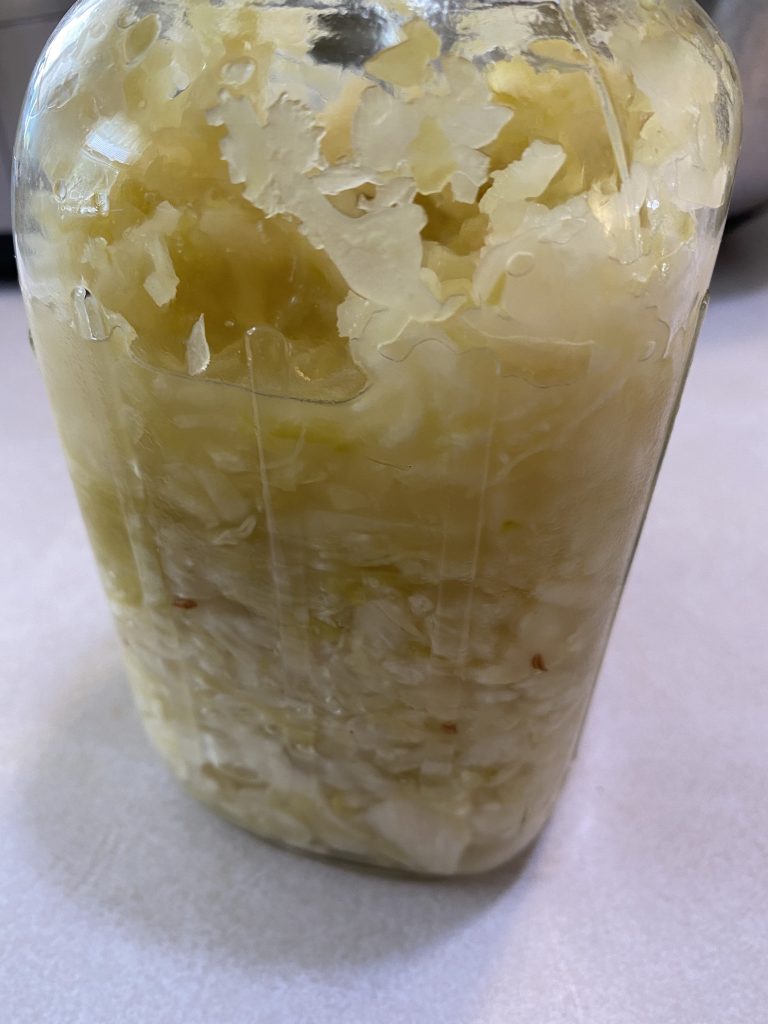
When making sauerkraut in jars, I do the process of preparing the cabbage a bit differently. I don’t want to pound it in a glass jar, so I put the cabbage and salt in a big bowl and massage the cabbage frequently (Just squeeze and kind of mix it for a while). I will let it sit if it doesn’t seem to be releasing enough water.
Once the cabbage is softened and has released water, I will pack it into the jar(s) and push it down with my kraut pounder. I then put the fermentation lid on and set it on a tray in my basement. If you don’t have fermentation lids or an airlock lid, you will need to burp the lid every day. To start you may need to burp twice a day. As the fermentation slows you can burp it once a day for a couple of weeks or until it slows and isn’t producing so much carbon dioxide. You can tell it needs to be burped if the metal lid is tented, it should push down easily in the middle once burped. If it does not push down (and make that sort of popping noise) you will need to burp it.
This is a video showing my method of making sauerkraut.
Kimchi-Style Sauerkraut
My husband and oldest son love Kimchi. They will buy it in the store and eat a jar in no time. They love it spicy. I like the flavor of kimchi, but like it a bit more mild than the store-bought.
I decided to make my own version. It is in no way traditional, so I want to put that out there as to not offend those who make traditional kimchi. It, however, has the kimchi flavors I love. I am not a huge fan of Nappa cabbage which is the cabbage traditionally used to make kimchi. It is a softer cabbage and really isn’t crunchy when fermented. I like to make it with regular green cabbage that holds the crunch a bit better and does not get so soft when fermented. Making it myself I can control the spice level and the amount of fish sauce. If you don’t want to use fish sauce, you can leave it out.
The Korean term “kimchi” refers to fermented vegetables. There are hundreds of variations of kimchi. Some are made with Nappa cabbage, some with cucumbers, or other vegetables. It is really a fascinating topic to research, as Northern Korea and Southern Korea have different variations that are popular and there are so many different methods and ingredients that can go in kimchi.
Ingredients for Kimchi-style Sauerkraut
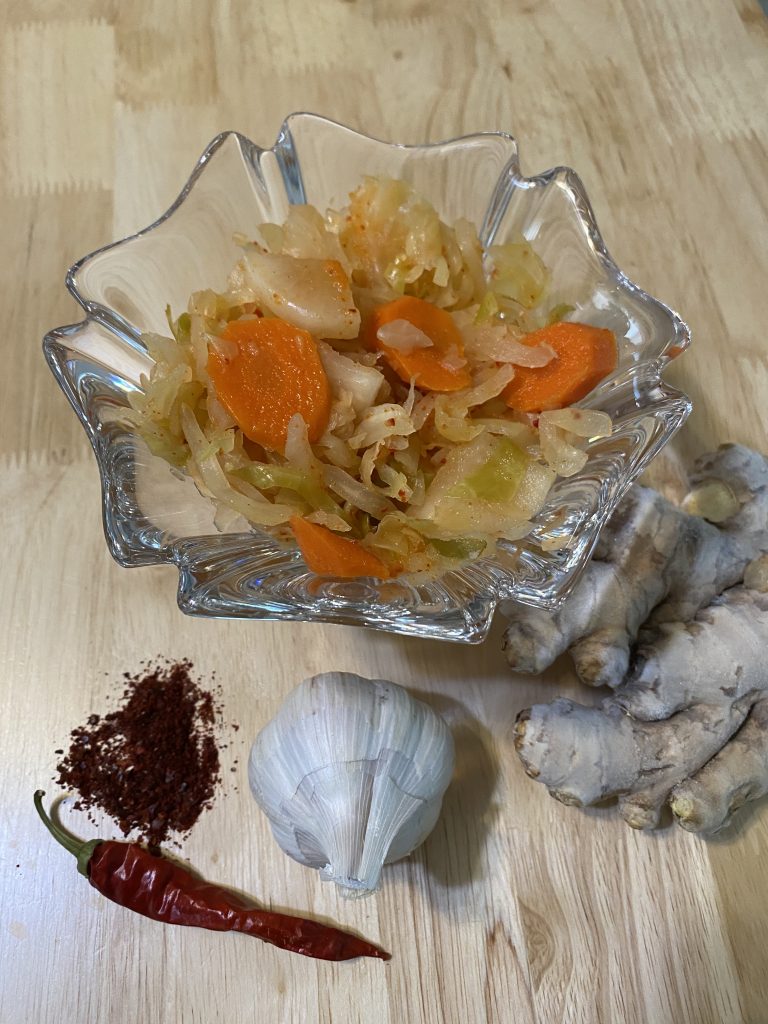
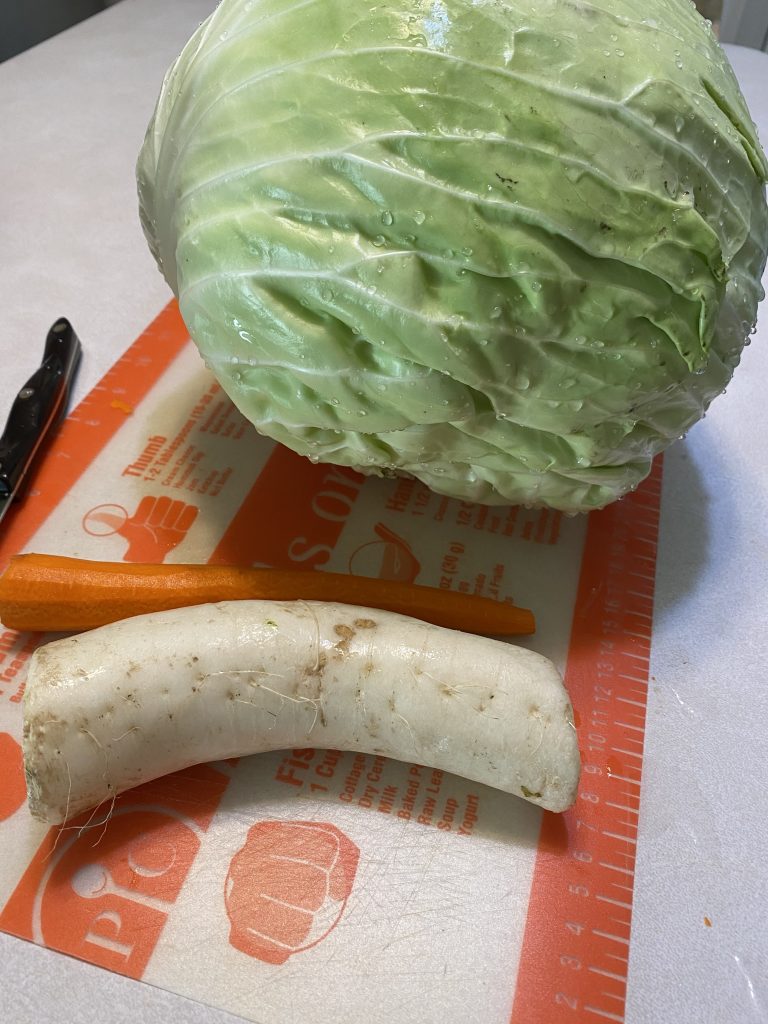
My non-traditional version of kimchi uses green cabbage. It is shredded by putting it through the food processor with the slicing blade. You can chop it by hand, or just quarter your cabbage and put it in a big crock. I use daikon radish and carrots, I like to just chop them into a medium dice size, but you can shred them. Sometimes I add chopped scallions, but most often I omit them since there are onions in the paste mixture. You can use Nappa cabbage if you like and it will be much closer to the traditional kimchi.
The flavors of the kimchi come from the paste made and mixed with the vegetables. This is key to flavorful kimchi You can adjust the amounts to your taste. My paste includes onion, garlic, ginger, Gochugaru (Korean pepper flakes), spicy pepper, and fish sauce. I make my paste in a blender. You can use a blender, a food processor, or do it by hand with a mortar and pestle. You just want a nice paste texture that you can mix with the vegetables. I thin it out with some of the soaking brine, in order for it to blend well in the blender.
Make sure your Fish sauce or any chili sauces do not have any preservatives in them, things like sodium benzoate, potassium sorbate, etc. They will prevent the good bacteria from populating which is what allows the fermentation process to proceed.
I use Celtic brand fine sea salt in my ferments. Do not use iodized salt, it will impede the fermentation. If you use something besides fine salt, you will need to adjust the amounts based on the salinity of the salt size. You can look up info on how to adjust the different types/sizes of salt.
Directions for making kimchi
I add my cabbage and chopped vegetables to a large bowl and add a salt brine to nearly cover them (you should push down and see the liquid, but when not pushing down it won’t be covering the vegetables). The brine should be 1 Tablespoon fine sea salt to 1 cup of water (I use filtered water). I use about 4 cups of brine for a batch, which is around 2.5 pounds of shredded cabbage. Pour the brine over the vegetables and cover them with a plate and put something to weigh down the plate. Leave it to sit for at least 3 hours up to overnight. Remove the weight and plate, it will have produced more liquid as the water is drawn out of the vegetables. Make sure your bowl has room for the extra liquid. You want to drain the vegetables, but reserve the brine.
Taste the soaked vegetables. I usually taste a piece of carrot. You want them to taste very salty (I say like the sea), but not so salty that they pucker your mouth or make you gag. If they are just right, continue with the process. If they don’t taste salty enough, sprinkle a teaspoon or two of salt over them, mix it up and taste again. Add till you think they are salty like the sea. If they are too salty (I had this happen once) you can gently rinse the vegetables to remove some of the saltiness (still reserve the original brine).
Once your vegetables are ready, I make the paste. You can add the amounts of ingredients to the paste that fit your tastes, adjust as you like. I add per batch of kimchi, a peeled and quartered onion, 4 large cloves of garlic, about 2 inches of fresh ginger, sliced, 1 cayenne pepper (fresh or dried), and about 1/4 cup of the Korean pepper flakes. Add the fish sauce if using it. If you want some of your kimchi with and some without fish sauce, add it to the jars instead. I add some of the soaking brine to help it blend smoothly. Add the fish sauce to the mixture and pulse, if using it.
Mix the paste and the vegetables. I like to put on food-safe gloves to mix. I find mixing with my hands is much easier than a spoon (like I do in the video), but if you don’t wear gloves, the hot pepper will get you. Burning hands are no fun. Use caution when working with hot peppers.
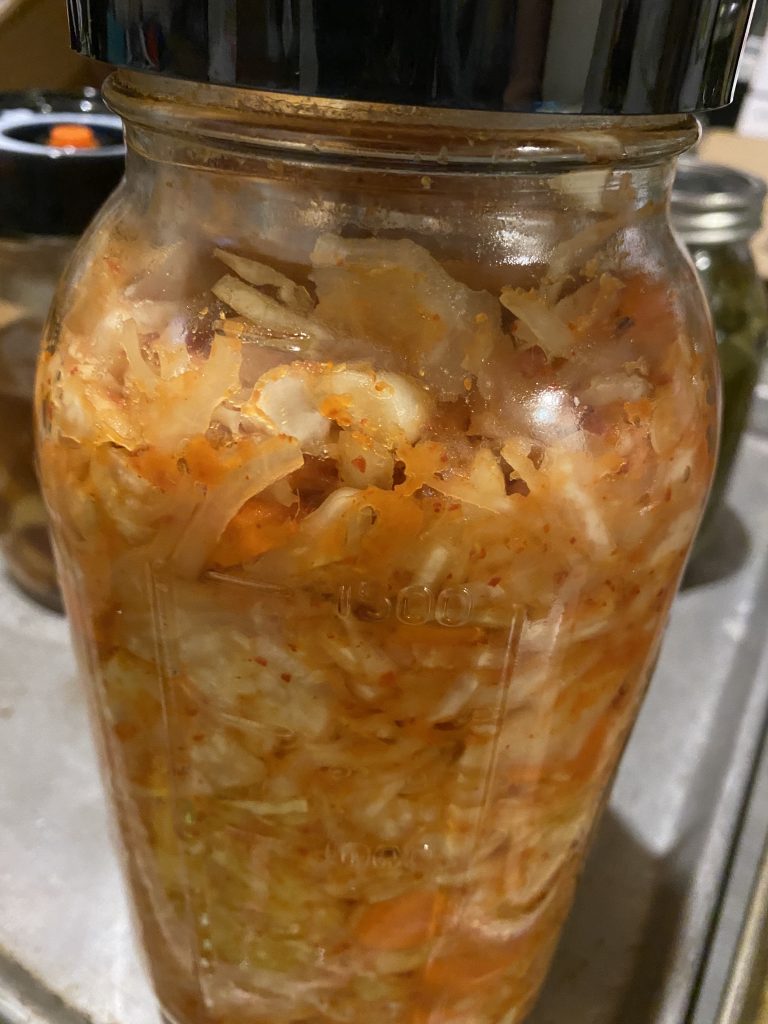
Once the paste and vegetables are mixed, I pack the kimchi into jars. Press the mixture into the jar so it is as tightly packed as possible, you can do this with a kraut pounder or other tool, or your hands. I like to leave at least an inch of headspace to make sure it doesn’t overflow as it ferments. I place the weight in and if the liquid does not go over the vegetables and most of the weight, I add some of the reserved brining liquid.
Once filled, I put the fermentation lid on and let it ferment. I find it takes about 4 weeks in my basement. I tasted it at 3 weeks and it was still a bit too salty. The jars I tried at 4-6 weeks were great. Once it is to my liking, I remove the weights, replace the lids with non-fermentation lids, and place the jars into the refrigerator. I like to use plastic lids for storing my ferments, I find that the metal bands corrode over time and I don’t want to waste the lids that I use for canning. The kimchi will absorb the liquid as it finishes fermenting. I find it is not nearly as juicy when it is finished as when it started.
There is a video of making kimchi-style sauerkraut at the bottom of the recipe card.
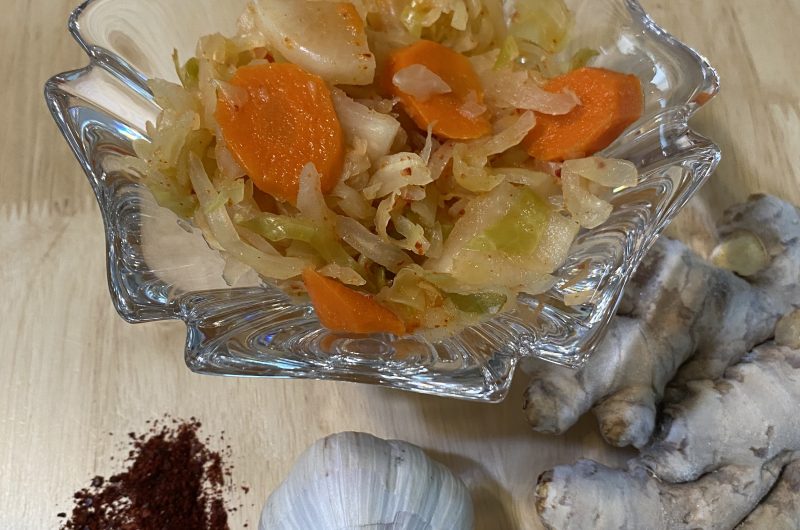
Sauerkraut and Kimchi-Style Sauerkraut
Course: Sides, fermented foods, condimentDifficulty: Easy2.5
quarts40
minutes3
minutes2-5
WeeksIngredients
2-3 pounds of shredded cabbage
1-2 large pieces of daikon radish, medium diced, chopped, or shredded
4 medium carrots, medium diced, chopped, or shredded
Fine sea salt
Water
1 medium to large onion, or a bunch of scallions
1-2 inch piece of fresh ginger root, peeled and sliced for blender, or grated finely (you want 2-3 Tablespoons grated) or to taste
4 large cloves of garlic, or to taste
3-4 Tablespoons Korean chili pepper flakes-Gochugaru, or to taste
1 spicy cayenne or other pepper (optional, to taste) or a chili paste without preservatives
2-3 teaspoons fish sauce (optional, to taste), without preservatives
Directions
- Shred cabbage, chop daikon radish, and carrots
- Place prepared vegetables in a large bowl or container
- Make salt brine (I generally need a quart) with 1 Tablespoon fine sea salt per cup of water.
- Pour brine over vegetables in a bowl, you want the brine to just come up to near the top of the vegetables (so when you push down they will be covered, but the brine shouldn’t cover them when they aren’t pushed down)
- Place a plate and on top of the plate place something heavy to weigh it down. You want to submerge the vegetables under the brine. Let that soak for at least 3 hours up to overnight.
- Drain the vegetables, reserving the brine. Taste a vegetable for saltiness. It should be well salted like the sea, saltier than you would ever want to eat, but not so salty that it puckers your mouth or makes you gag. If it isn’t salty enough, add a teaspoon of salt at a time and mix, taste again till it is correct saltiness. If it is way too salty, lightly rinse the vegetables and let them drain.
- Place onion, ginger, garlic, and spicy pepper in the container of a blender, add a bit of the reserved brine liquid. Blend well till smooth. Add the Korean chili pepper flakes and if you want to at this step the fish sauce. Pulse to blend just till well mixed.
- Pour the paste mixture over the vegetables and mix well. You will have some liquid release as you mix it, you want that.
- Pack mason jars tightly with vegetable mixture, adding any liquid left in the bowl to the jars. Leave at least 1-inch headspace in the jar.
- Place a weight on the top to push all the material down (you don’t want it clinging to the top sides of the jar). If the liquid does not cover all the vegetables and most of the weight, add some of the reserved brine to the jar on top of the weight/vegetables.
- Place a lid on the jar. If not using a fermentation lid or an airlock lid, you will need to burp the jars a couple of times a day in the beginning. I recommend placing jars that are fermenting on a tray to catch any possible leaks as it ferments.
- If fermenting in a cool spot, I would check it after three weeks, if too salty let it keep fermenting. It will take less time in a warmer spot, so I would check it sooner. Once you are happy with the taste, place it in the refrigerator to slow the fermentation. It will last many months.
Recipe Video
Notes
- When making sauerkraut of any kind if you add sweeter ingredients (like beets, fruit, etc.) it will ferment faster do to the higher sugar content